Monday, February 27, 2012

"S'Mores" Cupcakes


I have hesitated for a long time to make cupcakes. The few times in the past that I have tried, they haven't turned out well at all. But then I made some peanut butter ones a few weeks back that everyone seemed to enjoy, and thought, "Okay, maybe I can do this." The peanut butter ones were a little too dense for cupcakes, but their overall taste was good. Right now, in all honesty, I have no idea what makes a cake dense or fluffy. But as I start down this road of cupcake making- I aim to find out.


Anyways, I have been on Pinterest A LOT lately. And I do mean A LOT. Not just to browse, but with a purpose. I had several desserts I wanted/needed to make this weekend and I decided Pinterest was the place to look. There, I found this recipe-http://www.marthastewart.com/285211/toasted-marshmallow-cupcakes. It was almost like it screamed my name (well, maybe not quite:), but it certainly grabbed my attention and I pressed the link that sealed my fate. I decided right then and there that I HAD to make these things. Simply had to, no ifs, ands, or buts about it.


This recipe simply broiled a marshmallow on top of the cupcake. After "daydreaming" (as my sister insists I was doing)(maybe I was:-) about these things, I decided to improve on them slightly- layer graham cracker, chocolate bar, and then marshmallow before broiling. Come on, what's a s'mores without a graham cracker, right? RRiigghhtt?:)


So, after all of that, here's the recipe:

3/4 cup unsweetened cocoa powder
1 1/2 cups AP flour
1 1/2 cups sugar
1 1/2 tsp baking soda
3/4 tsp baking powder
1/4 tsp salt
2 eggs, lightly beaten
3/4 cup warm water
1/2 cup milk
1/4 cup sour cream
1/3 cup unsalted butter, melted
3/4 tsp vanilla

Marshmallows
Graham Crackers (approx. 2 crackers)
Chocolate bar


Preheat oven to 350. Line muffin/cupcake tins with liners or grease them.

Mix cocoa, flour, sugar, baking soda, baking powder and salt in a bowl. Stir in eggs, warm water, milk, sour cream, butter, and vanilla mixing until smooth.

Fill each muffin cup about 1/2 full, give or take a little. Bake until a toothpick, or other similar tool, comes out clean. Approx. 15-18 minutes.

Put oven on broil.

Break the graham crackers into small pieces and then place a piece on top of each cupcake. Then break the chocolate bar into pieces and place them on top of each graham cracker. And finally, place one marshmallow on top of each chocolate piece. NOTE: the recipe said to place the marshmallows on the cupcakes vertically, I found it easier to flatten them and stick it on- minimizing the chance of them falling off.

Do NOT leave the cupcakes alone under the broiler. You just want to brown the marshmallows which will happen very quickly. We are talking seconds. Once the marshmallows have browned, take out the pan and smash the marshmallows down.


These were really yummy. I would make them again and they weren't that hard either. Definitely a keeper. Enjoy!!

Wednesday, February 22, 2012

M&M Cookie Pie...Wait, Don't Forget the Peanut Butter


I have been going through this peanut butter phase. Peanut Butter cookies (they were REALLY good), Peanut Butter dip, and it seems like there was something else, but I forget.:) But now, a Peanut Butter M&M Cookie Pie. I soooo cannot wait to taste it.
I know several people who just love anything peanut butter, oh wait...I remember the other thing now- Peanut Butter cupcakes (I was told they were really good, too). Anyways, so I have no problem getting rid of these things when I make them. Because, trust me, I do have to get rid of them before I eat them all.
I originally found this recipe via Pinterest. It's original location is: http://www.culinaryconcoctionsbypeabody.com/2010/04/04/sweetie-pie/
Since it is still in the oven as I write this, I have no earthly clue as to whether it tastes good or not. But, honestly, can you go wrong with this combination? I could be wrong, but I think not. I also made my own pie dough, which at one point in my life, I had said I would never do again. But, ya know what they say- never say never.
I used the recipe my mom has used for years. The recipe, as is, can probably make at least three pie crusts, so I halved it. That being said, it also freezes well.

This is the recipe.

4 cups flour
1/2 teaspoon salt
1 cup margarine
1 egg
water
1 teaspoon vinegar

Mix flour and salt. Cut margarine into flour with pastry blender till very fine (mine wasn't really all that fine). Mix enough water into egg to make 3/4 cup. Add vinegar. Add liquid to flour mix. Mix thoroughly.

This is the cookie recipe:
One 9-inch pie crust
1 cup sugar
3/4 cup AP flour
3 tablespoons peanut butter
1/2 cup unsalted butter, melted
2 large eggs, beaten
1 teaspoon vanilla extract
1 cup peanut butter M&M's (I used PEANUT M&Ms as I did not have peanut butter ones)
2/3 chocolate chips

Preheat oven to 350. Roll out pie crust and put in greased pie pan. Crimp edge, if desired.In a medium bowl, combine sugar, flour, peanut butter, and butter, mixing well. Add eggs, vanilla, Peanut Butter M&M’s, and chocolate morsels. Transfer filling to prepared pie crust. Bake until firm in the middle, approximately 45 minutes.
NOTE: do not try judging its doneness by sticking something in the center. Only judge it by the firmness of the center.:)
PS. It was a hit!!!

Friday, February 25, 2011

So, these brownies won a bake-off...

You won't believe this, but I never took one picture during this whole process. I knew I wanted to put these brownies on my blog since I first made them, but I couldn't post them until a special event took place---- a Brownie Bake-Off!

It all started with a brownie. I brought a brownie (not one of these) to a lady I work with. She decided that we should have a brownie bake-off. I become one of five contestants. I choose featured brownies. I make two trial batches of brownies. I mess up a pan of my beautiful brownies when taking them out of oven for the bake-off. I fall down steps while carrying afore-mentioned brownies. I am just more than ready to be done with these brownies.

The winning brownies were the following: http://www.joyofbaking.com/barsandsquares/CreamCheeseBrownies.html. One thing this recipe suggested that I found quite helpful was to stir the batter by hand rather than a mixer. I think this might possibly help matters a little bit. These brownies are not for those who do not like themselves a good, super moist, super fudgey brownie. Because they are all of the above.

This is the first recipe that I have added some personal twists to . I added flour, subtracted sugar, divided the baking time, and I multiplied all times two and came up with a slightly different answer.

My Revised Edition---

Ingredients:

Brownie Layer
1. Approx. 13 tblsp of margarine
2. 1 cup of semi-sweet chocolate chips
3. 2 cups sugar
4. 2 tsps vanilla extract
5. 4 large eggs
6. 1 1/2 cups flour (although I think you could add even another 1/4 cup)
7. 1/2 tsp salt

Cream Cheese Layer
1. 16 ozs cream cheese
2. 2/3 cups sugar
3. 2 tsps vanilla extract
4. 2 large eggs


Preheat oven to 325. Grease a 9x13 pan. The first time I made this recipe, I followed it to the letter and line the pan with aluminum foil. This was the first and last time I ever plan on doing that. It stuck to the brownies and was just very annoying. I don't know about you, but I do not relish the thought of eating foil. From that attempt on, I simply sprayed the pan with cooking spray.

Put chocolate chips and butter together and heat them at 30-second intervals in the microwave
until they are melted. Once melted, stir in the sugar and vanilla. Once these are combined, stir in eggs one at a time. Stir in the flour and salt until thoroughly blended. Set aside 1 cup of batter to top the pan off with. Pour rest of batter into the prepared pan. I then cooked this for ten minutes while I prepared the cream cheese layer. Ten minutes will not cook it through at all and it won't even look remotely like it was in the oven, but I think this helped take away some of the mushiness.

Next, you will need a hand mixer to prepare the cream cheese layer. First, you will need to whip up the cream cheese by itself. After it is thoroughly whipped up, add in the sugar, vanilla and eggs until it appears creamy and smooth without any cream cheese lumps. Pour mixture over the batter. Top with dollops of the set aside batter.

Cook for 25 minutes or until an inserted toothpick comes out clean. The cream cheese layer should appear set and not bounce all over the place. I then let them cool and then of course they are to be refrigerated. I personally prefer them cold, but have been told that they are good warm.

So, here they are. My winning brownies. I'm not sure how soon I will make them again, as I have had quite a few lately, but when I do, I will take pictures and post them.

Monday, February 7, 2011

Not a big fan of chocolate... try this Apple-Cinnamon Cake.

I needed to make a cake for a friend's birthday... the problem(s)? Well, this friend doesn't like chocolate, and making a plain-Jane cake is a challenge to me. I much prefer making cheesecake or cupcakes, but I decided to rise to the challenge rather than deflate in defeat. Last year, my sister made a snickerdoodle cake... yea, snickerdoodle like the cookie (btw, I am not a big fan of the cookie). It was a really yummy cake, and I really am not a big fan of eating plain-Jane cake, anymore than I am of making it. I decided that I too, would make a Snickerdoodle cake. I went online and searched for recipes for Snickerdoodle cake. Most of the recipes were the same, except this one (http://www.cooks.com/rec/view/0,186,133188-245193,00.html). It caught my eye because its liquid ingredient was different than all the others-applesauce rather then milk. I like different, so I went with different.

My sister had said that the one thing she had not liked about her cake was that it was a little dry. I hadn't noticed, but I decided I was going to try and watch for that when making mine anyway. After I had mixed all the ingredients together, I decided the cake did need a little more moisture, so I added a little milk. I didn't measure it, but if I had to guesstimate, I'd say that it was about an 1/8 of a cup. I must also say that when I first looked at this recipe I was confused as to what I was supposed to do with the cinnamon. After looking at a couple of the other recipes, I decided that I was going to put some cinnamon in the batter and then sprinkle some of it over the greased pan. Armed with this decision and determination and delight and... ok, I'll stop there, I made the cake.


SNICKERDOODLE CAKE

1 cup applesauce
2 teaspoon cream of tartar
1 1/2 cup sugar
1 teaspoon soda
2 eggs
1/4 teaspoon salt
2 3/4 cups flour
1/2 cup cinnamon (divided)
approx. 1/8 cup of milk


Preheat oven to 400°F.

Per the recipe, I combined all the ingredients (1/2 of the cinnamon included) in the order they are listed, using my KitchenAid to mix them. I then sprinkled the rest of the cinnamon mixed with sugar over the greased 9x13 pan.

The recipe said to let it bake for 15 minutes and then bake it for 5 minute intervals afterwards if not done. I think that I ended up baking it for 25 minutes.


Buttercream Frosting:
http://www.food.com/recipe/Cinnamon-Buttercream-Frosting-77534

1/2 cup butter, room temperature
3 3/4 cups powdered sugar, sifted
3 -4 tablespoons milk (I used half and half instead)
1 teaspoon vanilla extract
1 teaspoon cinnamon

Beat butter. The recipe itemizes when and how to put each ingredient in. I think that I just put all the ingredients in at one time and beat them them in to the right consistency. When finished, spread it on the cake.

The cake turned out pretty good. It didn't really taste very cinnamony until I put the frosting on. After that though, the main taste was cinnamon. (I loved the frosting, btw)


Posted by Picasa

Thursday, January 27, 2011

My First Attempt at Crepes... and it went well!!!


After searching long and hard on the internet for a crepe recipe that appealed to me, I finally decided on the following link:http://constableslarder.blogspot.com/2009/02/savory-crepes.html. I had never made crepes before and at first found the thought a bit intimidating, but the more I looked at recipes, the easier the whole thing sounded. So, I decided to bite the proverbial bullet and make them... it went well, just ask my waistline.

Ingredients:

1 cup cold milk

1 cup cold water

4 eggs

1/2 teaspoon salt

1 1/2 cups flours

4 tbsp melted butter

The writer of the above blog said that he always uses Julia Childs' crepes recipe and as he was telling, saying, writing, whatever you call it, about this fact, he stated that she always put the ingredients in the blender. His way of doing it, however, was to simply whisk all the ingredients together. I found out that I much preferred Julia Childs' way of doing things. I started out just whisking the things together, and that went well up until the point I put in the flour. The batter got lumpy and I knew that wasn't right, as the recipe stated it was to be a thin batter. I double-checked to make sure I hadn't made a mistake and put the flour in too fast, but no, the recipe said nothing about that. So, I decided to do what the well-known cook used to do- blend it. And that worked well. Very well.

After the batter is ready, it needs to be refrigerated. Some recipes said one hour, this one said at least two hours. I just let it sit for two hours as I was busy anyway.

Right before taking out the batter, I got out a small, non-stick frying pan that I put a light coating of butter on. I then let it sit on medium heat for a few seconds before putting batter in it. I used a 1/2 cup as my pourer. This particular recipe recommends a 2/3 or 3/4 cup, but I thought I had seen something in others about even as small as 1/4 cup. I am glad I did, as it was, the recipe didn't make as many as I expected.

So, you pour the batter in. Next you wait at least a minute if not closer to two minutes to let it cook the first side. Don't be afraid of the first side burning, it has to cook just a little bit longer then the second side. Then you test whether it's ready or not by gently lifting the edge of the crepe with a spatula... I REPEAT, a spatula. I used a fork for the first one--- BIG mistake. Crepes are too thin to be poked by tines. But if the crepe lifts easily it is most likely ready to be flipped. The second side only has to cook for about a minute.

Some of the recipes suggest you put the filling on when the second side is cooking. That is what I did for the ones I made and I think that it is a great idea as it softens up the filling quite nicely.

Here are some filling ideas-

Nutella... no hassle, no fuss

Plain cream cheese filling... this link is the recipe I used- http://caloriecount.about.com/cream-cheese-strawberry-crepe-filling-recipe-r58293, it was yummy.

Cream cheese with cocoa... I wanted to spice up the above cream cheese filling so I added some cocoa mixed with sugar into it... that was also PPPRREETTYY yummy!!

Enjoy... I did!!:-)

Posted by Picasa

Wednesday, January 26, 2011

Posted by Picasa


My mom bakes a lot. And when I was still at home, she baked a lot, and I, as a homeschooled child, baking was part of my education:). I am grateful for this though and this recipe is one I remember as always being yummy, well except for the first time I made it but that was my fault. Anyways, I was stuck at home one day last week and thought that would be a good day to make some good, old-fashioned, homemade yeast bread. Maple Oat Bread is a Taste of Home recipe and you can find it at the following link: http://www.tasteofhome.com/recipes/Maple-Oat-Bread. My mom always makes it with regular old pancake syrup rather than maple and it tastes delish.


Maple Oat Bread:


1 cup old-fashioned oats

1 cup boiling water

1 package (1/4 oz.) dry yeast

1/3 cup warm water

1/2 cup "regular old pancake syrup"

2 teaspoons canola oil

1 1/2 teaspoons salt

31/2 -4 cups flour


Topping:


1 egg white, lightly beaten

2 tablespoons, old-fashioned oats


Place oats in a blender or food processor (I used a blender), cover and process oats for 6-7 seconds or until coarsely chopped. Transfer to a small bowl; let stand until mixture is cooled to 110*-115*. In a large bowl, dissolve yeast in a 1/3 cup warm water; add syrup, oil, salt, oat mixture and 2 cups flour; beat until smooth. Stir in enough remaining flour to form a soft dough.

Turn on to a lightly floured surface; knead until smooth and elastic, about 6-8 minutes. Place in a greased bowl, turning once to greased top. Cover, and let rise in a warm place until doubled, about 1 hour. Mine didn't rise as high as I would've liked and I think that that has something to do with the fact it wasn't very warm in my kitchen at the time.

Punch dough down. Turn onto a lightly floured surface. Shape into a 9-in. round loaf. Place in a 9-in. round baking dish. Cover and let rise until doubled, about 45 minutes.

Brush with egg whites and sprinkle with oats. Bake at 350* for 30-35 minutes or until golden brown. Remove from pan to a wire rack to cool.

This is a really yummy recipe. I have never had it with maple syrup before, but I bet that would taste really good.

Note:

  • Make sure it is rising in a warm place.
  • Make sure the liquids are not too hot or too cold when combining them with the other ingredients.


Monday, December 6, 2010

Truffles.... mmmm.... sigh:)


So, I have always wanted to make truffles, just never taken the time to or found a recipe I just HAD to try. Until now. While going through some holiday cookbooks to find some new Christmas cookie recipes to try, I found this one that just looked too easy to pass up. Hence, I made them and boy, was it worth it:). (And yes, I did just say that I was looking through cookbooks, the bane of my existence. Well, not quite that bad, but I do prefer Google:).


Here is the recipe:

1 10 oz package of mint chocolate chips

1/3 cup of whipping cream

1/4 cup butter or margarine (I used marg.)

sprinkles


Line baking sheet with waxed paper; set aside.


Melt chips with whipping cream and butter in heavy, medium saucepan over low heat (the highest I put it was 2), stirring occasionally (since it's on low, there's not a HUGE chance of it burning). Pour into pie pan. Refrigerate until mixture is fudgy, but soft, about 2 hours (I put it in the fridge for almost exactly 2 hours and it was a little harder than I wanted it to be but it worked).


Shape about 1 tablespoonful of mixture into 1 1/4-inch ball. To shape, roll mixture between your palms. Repeat procedure with remaing mixture. Place balls on waxed paper.


Place sprinkles in shallow bowl; roll balls in sprinkles. Place truffles in petit four or candy cups. (If sprinkles won't stick because truffle has set, roll truffle between your palms until outside is soft.) Truffles can be refrigerated 2 to 3 days or frozen several weeks.


Note: I totally forewent (is that a word?) the whole wax paper thing. I just shaped the balls, immediately rolled them in sprinkles, and then stuck them in a mini-muffin cup. The book rolled them in chocolate sprinkles, but I went for a more festive look with colored sprinkles. Although I haven't tried an actual truffle yet, I tasted it from the pan and it was PRETTY YUMMY!!! Enjoy!

Tuesday, September 28, 2010

Banana Bread- Scratch that- Banana Chocolate Chip Bread


Once again, I found myself looking for a recipe online. Sometimes there are so many that look worth trying that I wonder, "Which one should I try?" Well, a couple years ago, I chose this one for Banana Bread.... and I haven't tried to find another one. I have made it many times, and every time, it has turned out right- no, not just right, it's turned out grand. I have even put the batter into two mini loaf pans rather than one big one, and that has also turned out great. The following is the link to the website I found it on:


http://simplyrecipes.com/recipes/banana_bread/


The only way I have tweaked the recipe is by adding chocolate chips to it. I love chocolate, as do the people I cook for- my sisters. One of my sisters won't even touch Banana Bread that doesn't have chocolate chips in it. I must admit, I also prefer it with chocolate. I have never measured how much I put in, but I'd venture to guess 1/2 a cup.


Ingredients:


  • 3 or 4 ripe bananas, smashed (I usually use 4)

  • 1/3 cup melted butter

  • 1 cup sugar (recipe says this can easily be reduced to 3/4 cup, which I have never done)

  • 1 egg beaten

  • 1 teaspoon vanilla

  • 1 teaspoon baking soda

  • Pinch of salt

  • 1 1/2 cup of all-purpose flour


Preheat oven to 350. Mix butter into already mashed bananas in a large mixing bowl. Mix in the sugar, egg, and vanilla. Sprinkle the baking soda and salt over the mixture and mix in. Add the flour, mix in. At this point you would pour in the chocolate chips, if you want them in the bread. Pour mixture into greased 4x8 in. loaf pan. Bake for 1 hour, if an inserted toothpick comes out clean, it is done. Cool on a rack. Removie from pan slice to serve.


TIP: No toothpicks on hand? Use part of an uncooked spaghetti noodle

Monday, September 13, 2010

Flavored Rice

So, I made a very healthy dinner tonight... Salmon, rice and green beans. Those three things are all rather bland items so each of them needs some spicing up. The salmon I doused in lemon juice as usual, the green beans I buttered up and sprinkled with lemon pepper, the rice... well, the rice I was drawing a big fat blank on. How in the world does one spice up or season rice??? With this thought in mind, I googled "flavorful rice". I found several plausible options if I were a bean fan... so I kept sifting through the links and found this one, which was actually one of the first choices.
http://allrecipes.com//Recipe/flavorful-rice/Detail.aspx I tweaked this recipe quite a bit. The first thing I noticed was that I most definitely did not need 3 cups of rice, and I don't have a rice cooker, and I did NOT want the tomatoes in it, AND I only had minute rice on hand when the recipe calls for regular rice. So I decided to change the recipe a little bit, which I have switched recipes before but not a lot so I'm always a little nervous when I'm doing it.

But I went ahead with it and this is what I did:

According to the rice box directions for 1 cup of rice I needed 1 cup of water. So I put 3/4 cup of water in a pot, and then added 1 TBSP of olive oil and 1 TBSP of vinegar. Then I sprinkled oregano, salt, and pepper (I didn't have basil on hand) into the water solution which I then set to boil. After it started boiling, I poured in the cup rice, stirred it, covered it, removed it from heat, let it sit for 5 minutes (per box directions). After the 5 minutes, I checked the rice, it seemed a little too moist, and since the rest of dinner was not yet ready, I let it sit longer. By the time we were ready to eat, the rice was ready too. It was yummy and I would make it again. Have fun.

Tuesday, July 20, 2010

Rice and Sausage, or is that Hamburger, Bake


(Sorry, the pics didn't go where I wanted them to and they are backward... oops, but at least they are there)


I have made this meal many times, most of the time I make it just the way the recipe calls for, other times, I use hamburger rather than the Hot Italian Sausage cuz it's all I have. That is what I did tonight. The only other time that I have used hamburger rather than the sausage was ok, but not great. I did hamburger and salsa rather than the spaghetti sauce, trying to create the missing zip that hot sausage gives with the salsa. It came out watery and I don't think I liked the rice either as I believe I used brown rice which I dislike but it also didn't taste right in this bake.


Tonight, though, I tried a different approach with the hamburger. I seasoned it with cajon seasing. I'm not sure of how much I put in there, so I'll just say what I hate other recipe people saying... "season to taste". This turned out much better. One of my sisters said it was too hot, another said it was just right... I liked it, and I think that the meat in this recipe needs to lean towards the hot side. The following is the link to the recipe. http://www.cooks.com/rec/view/0,1942,157172-236205,00.html


I like this recipe because after preparation, it only takes 20 minutes to bake. This is because eveything is already cooked, it just all needs to get heated. I would think you would even be able to prepare this in the morning or the night before and then put it in the oven when you got home.
Ingredients:
1 pound hot italian sausage or 1 pound ground beef (seasoned heavily)
Spaghetti sauce
Rice (I use two cups)
Mozzarella
Brown beef and prepare rice. Grease pan (to be perfectly honest, I know not the size of the pan I use... it's at least 1/2 the size of a 9x13 if not more). After the beef and rice are ready, put sauce at the bottom of the pan then rice, then sauce and beef and cheese. Add one more layer of rice then beef and top it off with cheese. (I normally put tin foil on mine so it doesn't burn) Then put in preheated 400 oven for approximately 20 minutes or until it reaches the heat you desire. The way I layered mine is no exact to the link, but it all basically turns out the same.

Monday, June 21, 2010

A Classic- Pizza


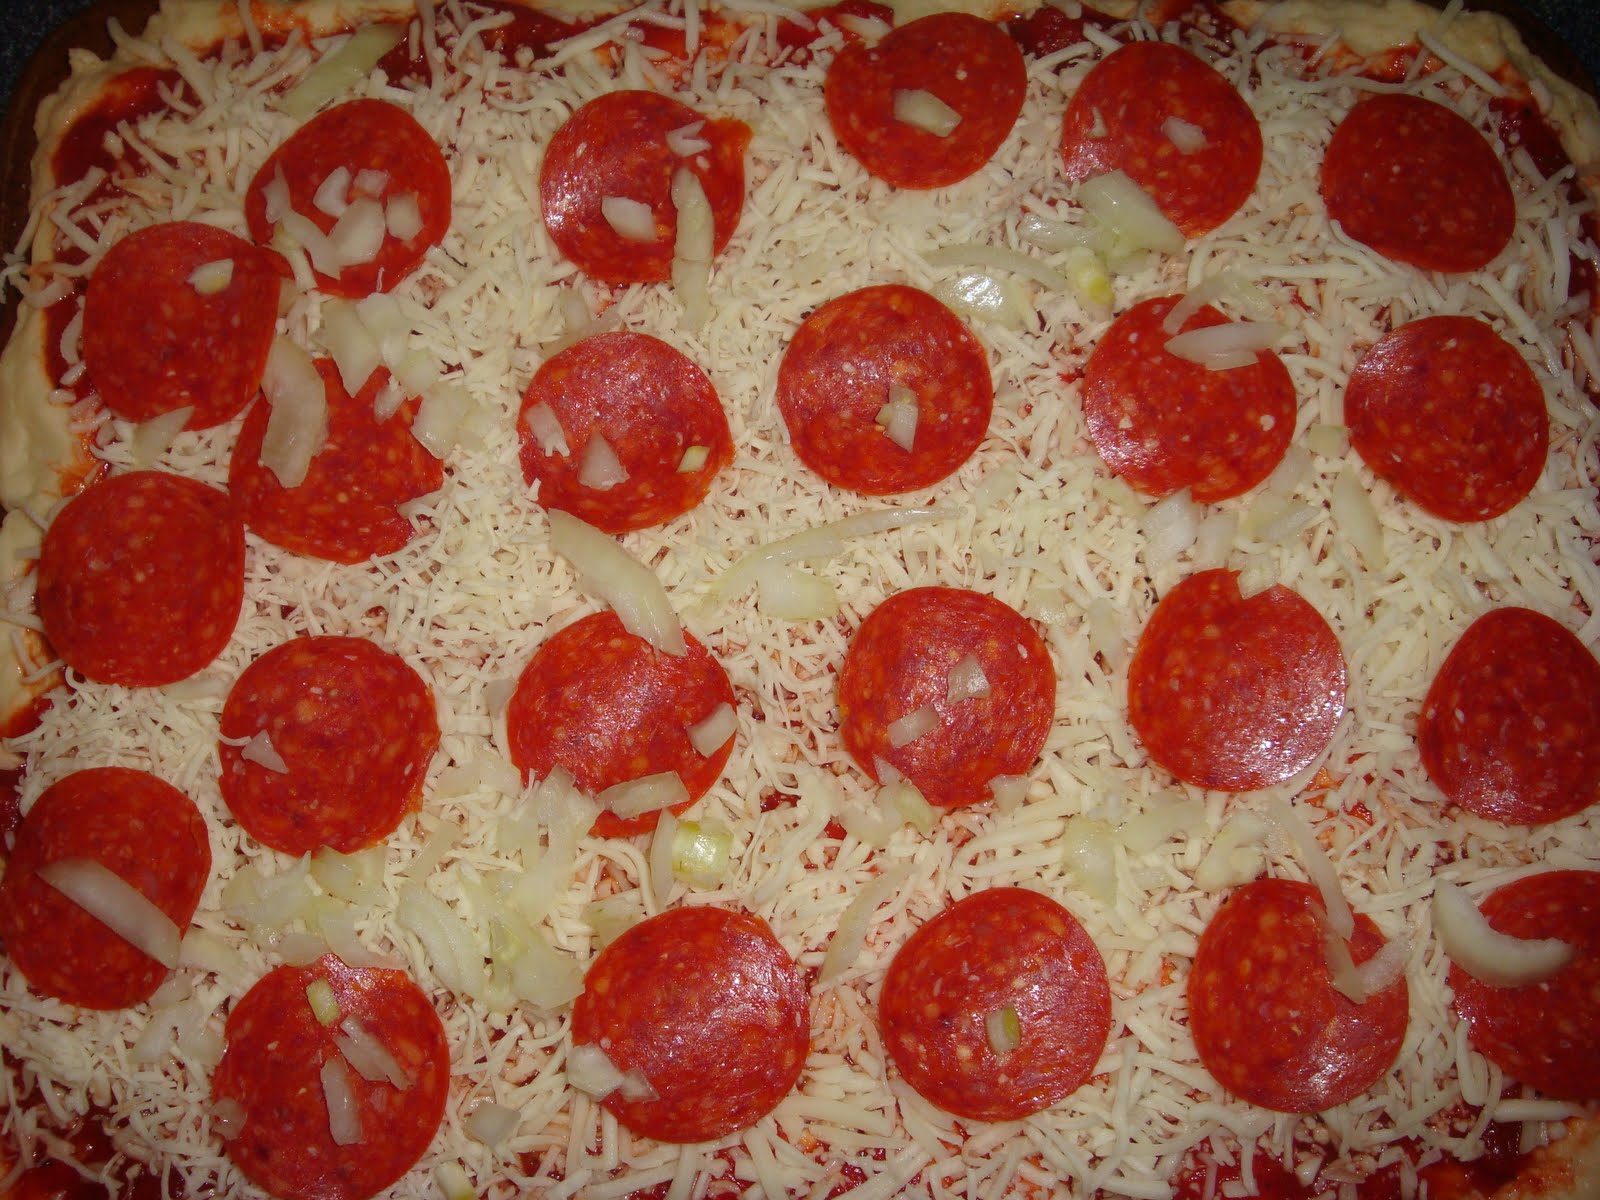
Pizza, pizza, pizza!! I love pizza, and I have taken recently to making it about every other week. There is a dough recipe that I have always used, one that my mom had gotten from somewhere and she made it all my growing up years (or better phrased, she made it up until her children were old enough to make it:). This recipe is great and I love it, it's one problem is that it is time consuming; and the last time I wanted to make pizza, I had a lot to do in the afternoon and needed something that wouldn't have to rise as long. My sister told me about this recipe that didn't have to rise as long. I tried it and it turned out great. The one difference is the sugar, I don't know why that cuts the rising time in half, but it did and it was still enough. I often double the recipe to make two pizzas instead of one and let it rise the same amount of time (I wouldn't more than double it though).


1 Package, or 1 Tablespoon, yeast (if doubling, do not double yeast)


1 cup warm water


2 cups bread flour (all-purpose is what I use)


2 tablespoons olive oil (if you don't have olive oil, canola works just as well)


1 teaspoon salt


2 teaspoons white sugar (if you leave this out, the recipe will be fine, just let the dough rise for an hour instead of 30 minutes)


In a small bowl, dissolve yeast in warm water. Let stand until creamy, about 10 minutes. (I just let it stand for 5 minutes)


In large bowl, combine 2 cups flour, olive oil, salt, sugar and yeast mixture; stir well to combine. Beat well until stiff dough has formed. Cover and let rise until double in volume, about 30 minutes. Meanwhile, preheat oven to 350F. (Note: I normally put my oven to 415F and bake for 12-15 minutes).


Turn dough out onto a well floured surface. Form dough into a round and roll out into a pizza crust shape. Cover with your favorite sauce and toppings and bake in preheated oven until golden brown, about 20 minutes.


Thursday, May 20, 2010

Cinnamon Rolls

I am a big sucker for homemade pastries... emphasis on the big. I don't have a lot of time to make them, as most are very much time consuming.... but every once in awhile, the craving hits me for one of those HOT and FRESH, out of the oven delights. And I have to give in, simply have to. Well, ok, maybe I don't have to, but I do.

Anyway, so one of those cravings hit me this week, and it happened to be for some cinnamon rolls. There is only one recipe that I have ever used for cinnamon rolls, I have been using it for several years. I actually got it out of a fiction book based back in frontier days and this lady had a bakery and she made these, and... ok, back to the cinnamon rolls... In this recipe was an optional filling that I had never seen before, chocolate chips rather than nuts with the cinnamon sugar. I wasn't sure how it would taste, but I tried it, and LOVED it. Some people are not a fan of
cinnamon rolls with chocolate chips, and if that's the case, you don't have to put them on the whole thing, or even at all. Cinnamon sugar works well by itself. I often put chocolate chips on half and leave the other half with just the cinnamon sugar.


These things may look difficult, but they aren't really. Just time consuming. In fact, it's really easy, when you get right down to it. Just try them, you'll love them.


Dough:

2 packages yeast (or 2 tblsp)
1/2 cup sugar, divided
1 cup warm water
1 cup milk
1/2 cup shortnening
1 tblsp salt
2 eggs, slightly beaten
6 cups flour


Filling:
1/4 cup sugar
4 tsp cinnamon
2-4 tsp softened butter
1/2 cup raisins (optional)
1/2 cup pecans (optional)
1/2 chocolate chips (optional)


Glaze:
1 cup confectioners sugar
2 tsp sugar
1 tsp vanilla


Dissolve yeast and 1/4 cup sugar in water. Set aside.


In saucepan, scald milk (don't quite boil it, but heat till it's bubbly around the edges.) Add shortening, 1/4 cup sugar, and salt. Stir until shortening is melted. Cool until just warm to the touch. (Here, I must say that I do not scald the milk, but rather put the milk , shortening, sugar, and salt into the microwave until the shortening has started to melt. Then I let it cool a little before dumping it into the yeast.) Add to the yeast mixture. Add eggs; stir well. Add 3 cups flour; stir until mixture is smooth and well blended. Add 3 more cups flour, or as much as is needed to make a soft but easily handled dough.


On a lightly floured surface, knead dough until smooth and elastic, about 5 minutes. (I use the KitchenAid hook to knead, but I do have to knead it by hand for a couple minutes if it becomes too much for the machine.) Place dough in greased bowl, turning to greased top. Cover with a clean cloth and let rise in a warm, draft free place until double. Punch dough down and let stand 10 minutes (ooops, forgot that 10 minutes last time I made these, and they still tasted good:)


Roll dough into 15x10 inch rectangle. Spread with softened butter or margarine. For filling, combine sugar and cinnamon and sprinkle evenly over dough. If desired, sprinkle optional ingredients over the cinnamon-sugar mixture. Roll dough up from long side, jelly-roll fashion; pinch edge to seal. Slice into about fifteen 1-inch slices.


Arrange slices in a greased 13x9 inch baking pan. Cover and let rise again until doubled in bulk. The past few times that I have made them, I have put them in the pan, and then put them in the fridge overnight. Then in the morning, I take them out and let them sit for half an hour before putting them in the oven. I've heard it's not good to put cold glass into a hot oven, so I obey...for once:).This way, you get fresh rolls for breakfast.


Preheat oven to 375F. Bake rolls about 20-30 minutes. They should be lightly browned both top and bottom. Cool in pan wire rack for 5 minutes; drizzle with glaze.
(I will post more pics later)


Friday, May 14, 2010

Cream Cheese Chicken

I suppose I should start taking pics when I make my meals... but for this first post, I have no pic. It really is simple, which is what I go for since I don't get home till late afternoon. The crockpot and my KitchenAid (which has absolutely nothing to do with this post:) are my best friends in the kitchen. Anyway, back to the recipe.

- 1 chicken cut up, about 3-4 pounds chicken parts (without ribs would work best)
-2 tblsp melted butter
-salt and pepper
-2 tblsp dry Italian salad dressing
-1 can of something soup (as I like to call it... cuz there are quite a few) i.e. cream of chicken, cream of celery, cream of mushroom... any will do
-6 oz. cream cheese, cut in cubes
-1/2 cup dry white wine or sherry (I used vinegar, which gives it a different taste methinks, but a good one)
-1 tblsp finely chopped onion


Wash chicken and pat dry (umm, I only do this cuz I feel guilty if I don't follow the recipe to the letter... well, at least most of the time). Brush with butter and sprinkle with salt and pepper. Place chicken pieces in crockpot. Sprinkle dry salad mix over chicken. Cover and cook on low 5-6 hours (I am gone from about 8 a.m. till at least 6 p.m., yep, that's right, approximately 10 hours minimum. Even though chicken creates its own juices, I normally put in some water... other than that, the chicken will be fine, very tender, but very fine.)

About 1 hour before serving, mix soup, cream cheese, wine and onion in a saucepan. Cook until smooth. Pour over chicken; cover and cook for 30 minutes longer. (Last time I made this recipe, I made the sauce in the morning, and then refrigerated it. So, when I got home, I just had to pour it and wait 30 minutes. The sauce only takes about 10 minutes to make.)

Serve over rice or noodles. (I prefer noodles, well, to be honest, I haven't even tried it over rice cuz I so like the noodles).

I love this recipe, and am now thinking I need to make it again after writing this post. I hope you enjoy it as much as I do if you try it. And if you don't like it, well, umm, to each his/her own:).

Easy Recipe for Chicken in the Crockpot - Easy Recipe for Chicken with Wine

Bitten by the Bug

And so, the proverbial blogging bug has bitten me... I have thought about writing a blog for some time and have finally taken the step from thinking to doing. I love to write, I don't always make much sense, but I enjoy doing it and thought that I'd do this blog on something that I've been doing quite a bit of lately... you got it, cooking/baking. I'm sure that you had no idea that that was what was coming:), there are a lot of culinary blogs out, most of which are much more interesting than mine. I am going to be writing my posts from my personal experience... as I am in the kitchen not necessarily out of pure love and enjoyment, but out of necessity. If I don't cook, truth is, I don't eat... well, at least I don't eat healthy. I am the only one who cooks in my house... except for the occasional chip-in from one of my sisters... But yeah, I am the Chef in my house:) And with that, I will share my first recipe with you... one of my all-time faves... Enjoy!!